Kernel
Linux is a kernel: the core of an operative system. Operating systems that use the Linux kernel are called Linux Distros (Distributions).
A Kernel:
- Executes first when the computer finishes booting up and has full access to the hardware.
- Implements drivers to control peripherals, network devices and other resources.
- Runs other programs (userland software) and allows them to communicate with each other and with the hardware through system calls.
Compiling
First, install the necessary dependencies. For example, on Debian:
sudo apt install build-essential
sudo apt build-dep linux
Compile the Kernel from Scratch
git clone --depth 1 https://github.com/torvalds/linux # GitHub mirror
cd linux
make tinyconfig # OPTIONAL: Creates the most minimal configuration possible.
make nconfig # Configure the kernel before compiling
The kernel binary compiles to arch/x86/boot/bzImage on x64 systems.
Rebuild the Kernel for an Existing Installation
mkdir linux-parent && cd linux-parent
git clone --depth 1 https://github.com/torvalds/linux
cd linux

cp /boot/config-$(uname -r) .config # Copy current kernel config
make nconfig # Edit the current kernel configuration
diff /boot/config-$(uname -r) .config # Check your changes

# Do not include debugging symbols. Alternatively, use `strip` to remove them. (these configs are working as of 6.14)
scripts/config --undefine GDB_SCRIPTS
scripts/config --undefine DEBUG_INFO
scripts/config --undefine DEBUG_INFO_SPLIT
scripts/config --undefine DEBUG_INFO_REDUCED
scripts/config --undefine DEBUG_INFO_COMPRESSED
scripts/config --set-val  DEBUG_INFO_NONE       y
scripts/config --set-val  DEBUG_INFO_DWARF5     n
scripts/config --disable DEBUG_INFO_DWARF_TOOLCHAIN_DEFAULT
Install Manually
make -j$(nproc)
sudo make modules_install
sudo make install # Copies the kernel image to /boot and updates initrd and grub.
Before rebooting, run uname -mrs, and note the version. On your next reboot, use the same command to verify that you are using the new kernel.
To remove the kernel after installing it manually, run the following commands:
sudo rm /boot/*-<version>*
sudo update-grub
Install Using dpkg (Debian)
make -j$(nproc) deb-pkg LOCALVERSION=-custom
sudo apt -i ../linux-headers*-custom*.deb
sudo apt -i ../linux-image*-custom*.deb
Modules
A kernel module is a snippet of code that can be added to the kernel and managed without having to recompile the kernel.
For example, this example.c file would be a valid kernel module, that prints a message to the log once it is enabled or disabled:
#include <linux/init.h>
#include <linux/kernel.h>
#include <linux/module.h>

MODULE_LICENSE("GPL");
MODULE_AUTHOR("Trude");
MODULE_DESCRIPTION("A simple kernel module to print a log message");
MODULE_VERSION("0.1");

static int __init kernel_message_init(void) {
 printk(KERN_INFO "Example module loaded!\n");
 return 0; //  Non-zero return means module couldn't be loaded.
}

static void __exit kernel_message_exit(void) {
 printk(KERN_INFO "Example module unloaded!\n");
}

module_init(kernel_message_init);
module_exit(kernel_message_exit);
To install the module, it first must be compiled.
The following Makefile can compile, clean, and test the module:
obj-m := example.o

all:
	make -C /lib/modules/$(shell uname -r)/build M=$(PWD) modules
clean:
	make -C /lib/modules/$(shell uname -r)/build M=$(PWD) clean

test:
	sudo dmesg -C          # Clear the kernel log
	sudo insmod example.ko # Load the module
	sudo rmmod example.ko  # Unload the module
	sudo dmesg             # Read the kernel log
Then, to run the module:
make       # Compile the module
make test  # Load and unload the module
make clean # Delete the object files created at compile time

Syscalls
To “ask” the kernel to perform a hardware task and to access the file system or another resource, a program executes a syscall.
For example, in x64 assembly:
// sys_write (Print to stdout)
mov rax, 1
mov rdi, 1
lea rsi, [hello_world]
// Buffer length
mov rdx, 14
syscall
This snippet implements a syscall that prints text to stdout, usually a terminal window.
A C program generally uses libraries, which then implement system calls to perform actions.
To monitor system calls, use the
straceutility.
Processes
A process is an instance of a running program: When a program is executed, the kernel assigns a PID (Process ID) to it, defines a state (wether it is running, stopped, etc), defines which process spawned the program, and assigns it memory space (or address space): Virtual memory, preventing the program from accessing the memory assigned to other processes.

After creating the process, the kernel loads the program into memory and starts it. Once the program finishes or is terminated, the kernel reclaims its resources.
When a program is compiled, it is turned into an executable, which is usually an ELF file. Scripts starting with #! (script_format) are also valid executables.
Execute Programs
To execute a program, the kernel first parses the executable to detect whether it is a script or ELF file, and then, CPU registers are updated (instruction pointer -> ELF entry point, etc). Finally, the program is executed, instruction by instruction, on the CPU.
To run multiple processes concurrently, the kernel takes a “snapshot” of the CPU state (registers) of the current process, and loads the next process with its own state. This cycle is repeated to alternate between threads. Modern CPUs have multiple cores, which often have two threads each, and it’s the kernel scheduler’s job to manage these resources efficiently.
Devices
Device Drivers
Once a new device is plugged in, it attempts to call the Kernel, which identifies that device. The Kernel then loads the appropriate driver. Drivers are Kernel Modules used to interact with hardware. Once the required module is loaded, the Kernel calls the udevadm program, that creates a device file in the /dev directory.
Whenever there is a read/write operation to that device, the Kernel intercepts the request and calls the driver function instead, which implements that operation, and this is why a driver must implement all possible file operations.
Not all devices control hardware. For example, /dev/random generates a random number.
In the Linux Kernel, there are Character Type Devices and Block Type Devices.
A Character Device provides an endless stream or characters that can be read one at a time. This includes a keyboard and sensors, for example. Block Devices provide data as blocks of a defined size. These include disks and USB drives.
The only exceptions are Network Devices. Network data cannot be manipulated with file operations, so they are handled differently in the kernel.
Network Devices
If a network card is plugged in, like any other device, it communicates with the Kernel, and the Kernel loads the appropriate Kernel Module that contains the driver. After that, the driver adds new entries to the Kernel’s NICs, which are data structures stored in memory. The driver then creates configuration files in the /sys/class/net/ directory. These are not device files, just configuration files. Different network cards can have multiple network interfaces, and even multiple ports to connect to an Ethernet cable, for example. Each interface gets its own folder, as they can have different configurations. Editing these files can change device configurations, but the only way to actually use these interfaces is by calling the Kernel directly. The Kernel can, in turn, create a virtual file in memory, which is then passed as an ID to the application. The application still receives it as a regular file ID (File Descriptor), like with any other device, but it works differently from the Kernel’s perspective.
A GPU works similarly, and although the Kernel exposes these devices as files, they are not real files in the filesystem, as doing so would slow them down immensely.
GPUs
At the startup time, a device file is generated for the GPU, like any other device.
When an application attempts to use the GPU, it first searches for a Graphics API to use with it. Examples include Vulkan, OpenGL and DirectX.
These APIs are code functions that forward the requests to a library such as Mesa.
Mesa then calls the Kernel’s DRM (Direct Rendering Engine), which then calls the GPU driver to provide GPU capabilities.
The GPU still has a device file, which is used by the Kernel’s DRM and Mesa, but most commands are delivered to the GPU driver directly.
Shell (bash)
The kernel by itself isn’t intractable, so a shell is needed for the user to be able to execute programs and run commands. bash is not only a prompt, but also an interpreter for its own programming language, which can be used to write scripts and automate tasks.
Commands
bash performs actions through commands. A shell command consists of the command itself, followed by its arguments.
command "arg1" "arg2"
If the first word of a command is a reserved word, bash handles the command, otherwise, it searches for an executable on the system’s $PATH, a list of directories where a binary could be located.
Shell Scripts
While bash is typically used as the login shell, it is slow for script execution. For this reason, many distributions (such as Debian) use dash to run sh scripts (symlink /bin/sh to /bin/dash), which is a faster alternative to bash, designed specifically to execute scripts and to be strictly POSIX compliant.
When writing scripts, it’s a good practice to follow the POSIX standard, to make them compatible with most shells, older systems, and different distributions, while taking advantage of dash’s faster performance. Keep in mind that dash is not bash compatible, and some bash commands might not work on dash.
Example script.sh:
#! /bin/sh

echo "Shell Script"
Execute the script:
chmod u+x script.sh  # Give the script execution permission (to its owner)
./script.sh          # Run the script
After writing a script, use shellcheck to check for issues.
Learning
tldr command     # Examples of how to use the command (external tool)
help command     # Short documentation for the command
man command      # Full documentation for the command
man dash         # Dash documentation; Includes most built-in commands
To get started, use
helpby itself, which provides a list of the built-in commands available in bash.
For example, suppose you want to learn how to write an if statement in bash:
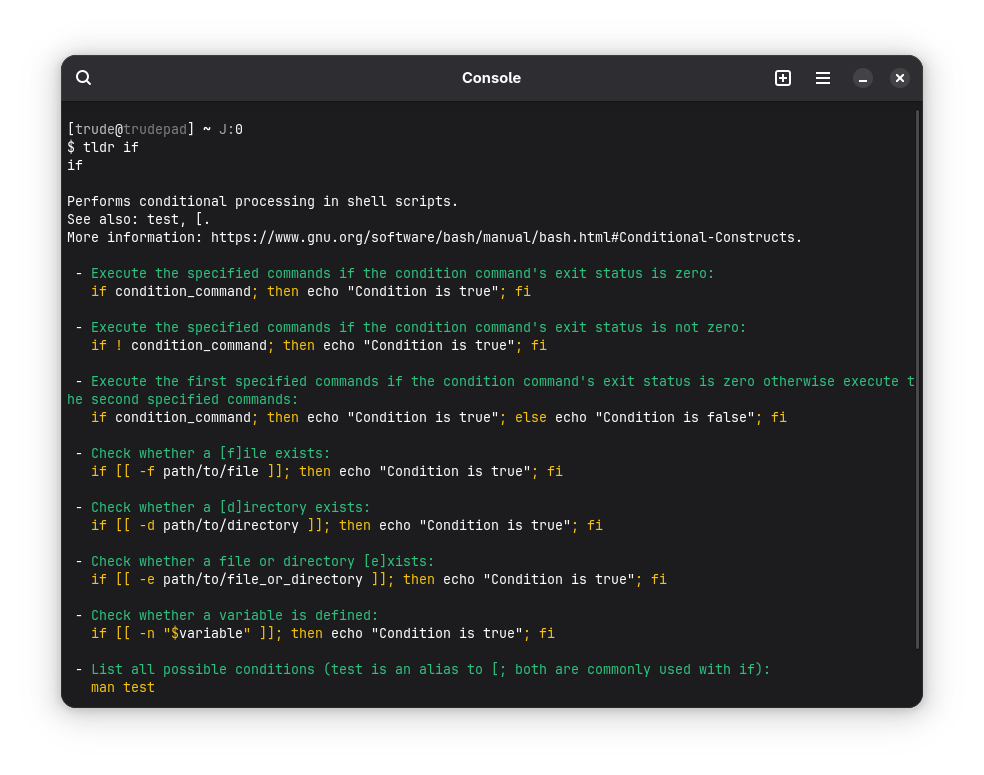
As suggested by tldr, to see all possible conditions, use the man test command.
If you are writing scripts using
dash, it’s recommended to read thedashmanual instead:man dash. Theif [[ ]]syntax is exclusive tobash, for example, and should be replaced withif [ ]to use withdash.
Compiling
Dependencies:
sudo apt build-dep bash
Compile Latest
git clone --depth 1 https://git.savannah.gnu.org/git/bash
mkdir bash-build && cd bash-build
../bash/configure
make -j$(nproc)
sudo make install # To specify the destination, use DESTDIR=...
Recompile Debian Package
sudo apt install devscripts debhelper
mkdir bash-build && cd bash-build
apt source bash # Download bash source
cd bash-*
debuild -j$(nproc) -uc -b
sudo apt install ../bash*.deb
Programs
Bash includes a set of builtins: Command-line utilities that come within bash itself. However, these are very limited, and to actually make the computer useful, more programs are needed.
To learn more about a program, use:
man program_name.
Coreutils
Coreutils are a collection of small command-line utilities, which are essential for text, file and shell manipulation.
arch | base64 | basename | cat | chcon |
chgrp | chmod | chown | chroot | cksum |
comm | cp | csplit | cut | date |
dd | df | dir | dircolors | dirname |
du | echo | env | expand | expr |
factor | false | fmt | fold | groups |
head | hostid | hostname | id | install |
join | kill | link | ln | logname |
ls | md5sum | mkdir | mkfifo | mknod |
mktemp | mv | nice | nl | nohup |
nproc | numfmt | od | paste | pathchk |
pinky | pr | printenv | printf | ptx |
pwd | readlink | realpath | rm | rmdir |
runcon | seq | shred | shuf | sleep |
sort | split | stat | stdbuf | stty |
sum | tac | tail | tee | test |
timeout | touch | tr | true | truncate |
tsort | tty | uname | unexpand | uniq |
unlink | uptime | users | vdir | wc |
who | whoami | yes |
The most popular set of coreutils by far is GNU’s coreutils. For embedded systems, it’s common to use BusyBox instead, as it is much lighter on resources. There is also an ongoing effort to port GNU’s coreutils to Rust: uutils coreutils.
util-linux
Util-Linux, much like coreutils, is a collection of smaller programs. These are used mainly for maintenance and interfacing with the kernel, filesystems, the clock, etc.
Unlike the coreutils, which are present in almost every system, distributions often pick which programs to ship from the util-linux package. For example, Debian doesn’t ship rename, hwclock, and cal by default, among some others.
bin/dmesgkilllsblkmoremountpointsuwdctlfindmntloginlsfdmountpipeszumount
sbin/agettycfdiskfsck.cramfsmkfspivot_rootswaponblkdiscardchcpufsck.minixmkfs.bfsrunuserswitch_rootblkidctrlaltdelfsfreezemkfs.cramfssfdiskwipefsblkprfdiskfstrimmkfs.minixsuloginzramctlblkzonefindfshwclockmkswapswaplabelblockdevfscklosetupnologinswapoff
usr/bin/bitscolumnhardlinkloggermcookiescriptreplayutmpdumpcalcoreschedhexdumplookmesgsetarchuuidgenchfnejectionicelsclocksnameisetpgiduuidparsechmemenosysipcmklscpunsentersetprivwaitpidchoomexchipcrmlsipcprlimitsetsidwallchrtfadviseipcslsirqrenamesettermwhereischshfallocateirqtoplslocksrenicetasksetcolfincoreisosizelsloginsrevuclampsetcolcrtflocklastlsmemscriptulcolrmgetoptlastlog2lsnsscriptliveunshare
usr/sbinaddpartldattachreadprofilerfkilluuidddelpartpartxresizepartrtcwake
Text Editor
To read and write files on the system, we can make use of coreutils:
touch file.txt         # Create a file
echo "Data" > file.txt # Write to file
cat file.txt           # Read from file
Although these commands do work, this workflow is not practical, especially for editing large, multi-line files, or even writing new software. There are many text editors, and which you decide to use is a matter of preference.
Most distributions ship a stripped-down version of vim, but other editors such as nano and regular vim are available in virtually all software repositories.
Vim
The original Vi editor was included with Unix as proprietary software. Vim was created as an open-source alternative, which improved Vi with many new features, including syntax highlighting, plugin support, and multiple undo/redo levels, among others.
Vim is still widely used due to its efficiency, as it uses modal editing to implement the following modes:
- Normal Mode: Navigate the file; delete; copy; paste; etc.
- Insert Mode: Type new text.
- Visual Mode: Select text.
To use these modes effectively, one must learn Vim’s keyboard shortcuts. Vim provides a tutorial to help new users get started:
sudo apt install vim
vimtutor
Vim can be heavily customized and extended. Many of its own features can be toggled at compile time. To see which features your installation has enabled, run: vim --version.
Vi (vim.tiny)
The /bin/vi path on Debian is a symlink to vim.tiny, which is a version of Vim that was compiled with many optional features disabled to keep the binary very small. At the time of writing, vim.tiny is only ~1.9 MB in size for x64 systems (apt info vim-tiny).
Nano
Nano is a more friendly and simple alternative to Vim. It isn’t nearly as efficient, but it’s more approachable for new users who might not be willing to learn Vim’s complex keyboard shortcuts.
Debian also provides a tiny version of Nano in its repositories, nano-tiny, at only 139 kB.
Libraries
Libraries are collections of reusable code that programs can access. On Linux systems, there are static libraries, which are compiled with the program and increase the binary’s size, and dynamic libraries, which are linked at runtime and can be shared by multiple processes to save disk space and memory.
Glibc
Glibc is the GNU’s implementation of the C standard library, which is needed for almost all C programs. It provides wrappers for system calls and bundles ld-linux, which is the dynamic linker/loader for ELF executables.
To see which dynamic libraries are linked to a binary, run: ldd /path/to/executable.
Ncurses
Different terminals have their own control sequences to move the cursor and format text. ncurses acts as an abstraction layer and facilitates creating TUIs (Terminal User Interfaces).
Init System
The init system is started by the kernel as soon as it boots. It is resposible for managing services, starting the shell, and reboot/shutdown of the system.
The bare minimum init script to start the system could be as follows:
#! /bin/bash

mount -t proc none /proc
mount -t sysfs none /sys

exec /bin/bash
Debian uses Systemd, and so, systemctl is used to manage services.
A service is a unit file that specifies how to start, stop, reload and manage the processes associated with the service. After starting a service, it runs in the background until stopped.
Unit files are usually located under /lib/systemd/system/ and /etc/systemd/system/.
To check how long each service takes to load, use: systemd-analyze blame.
GRUB
GRUB allows the user to select which kernel to boot to, load kernel modules before the kernel starts, and is responsible for loading the initial RAM disk (initrd), and thus, starting the system.
Once GRUB finishes, it is no longer loaded, and the kernel takes control of the system.
To change GRUB configurations, edit /etc/default/grub, and then run update-grub to generate the configuration file that GRUB reads at boot time (/boot/grub/grub.cfg).
Disk & Data Storage
The previous building blocks are all that is needed for the system to boot, however, those files must be loaded from somewhere: The disk.
When the computer starts, the motherboard’s firmware (BIOS or UEFI) initialize the hardware. It then performs a POST check to verify if every component is functioning correctly. Then, the firmware determines which disk (or another storage device) to boot from, and executes the bootloader (GRUB in our case).
Disk Partitions
Except for the /boot and /root partitions, all partitions are optional and flexible. Any optional partitions can be added to the disk, however, these are the most common ones:
| Partition | File System | Description |
|---|---|---|
/boot | ext2 | Store kernels and boot info. This should always be the first partition on the drive. |
/boot/efi | FAT-32 | Needed to boot with UEFI. |
/BIOS Boot | Only applies to GPT, and is usually a 1 MB partition for GRUB to install the bootloader on. | |
/root | ext4 | Stores system files. |
/swap | swap | Use the disk as ‘slower RAM’, if the system RAM is full. |
/tmp | tmpfs ext3 | Temporary file system. |
/home | ext4 | Stores user files. |
Manage Partitions
fdisk (from util-linux) is one of the most common programs to manage partitions.
sudo fdisk /dev/sdX
Then, type m to read the manual.
Format Partitions
Use the mkfs command to format existing partitions.
mkfs -v -t ext4 /dev/sdX
For initializing swap, use mkswap /dev/sdX instead.
Mount Partitions
A partition must be mounted for the host system to be able to access it.
mkdir -p <dir>
mount /dev/sdX <dir>
Use the
-t <fs>flag to specify the file system ifmountfails to detect it automatically.
File Systems
Concepts
- An
inodeprovides the following information:- Pointer to the file
- Creation date / Modified times
- Permissions
- A
directory (table)contains the data before the current directory, the directory itself, and every file inside that directory. - A
blockis the standard data unit for data in a hard drive. (Same size as memory pages. Exx86CPU would use4 KBas the block size.)
EXT2
Uses linked lists to store and lookup data, to keep the implementation of the filesystem itself as simple as possible. A simple filesystem makes it easier to repair (or skip) broken sectors on the hard drive.
Partition Layout

EXT3
Journal
EXT3 implements a journal to act as a buffer after a crash. If any operation in the journal fails, because it was logged, the filesystem is able to recover and finish any pending operations quickly, and not lose data. EXT2 had another issue, where if an opened directory were deleted, its inode wouldn’t be deleted, leaving an orphaned, empty inode on the filesystem. If the program holding it was to be closed, the inode would be deleted, but in the event of a crash, the inode would be left in the filesystem, with no way to be freed.
HTrees
EXT3 can also use a HTree (similar to a binary tree) instead of a linked list to store directory entries, making lookup times much faster. To build the HTree, all filenames are hashed and ordered, making the implementation more complex. This feature is disabled by default.
Scalability
Before, only one core could write to the superblock at a time, but EXT3 updates inode and block count at the block group descrip_t_or level. The superblock is only updated through a system call: statfs(), or if the filesystem is unmounted.EXT3 also removed big kernel locks (deprecated feature that added the ability to freeze the kernel), and sleep_on(), which was replaced with wait_event(), preventing infinite loops.
These patches improved multicore performance by over 10x.
Preallocation / Reservation
Writing two files simultaneously can create noncontinuous space.

Because EXT3 was designed to be used with HDDs, and separate portions of a file would slow down read speeds, EXT3 implemented a preallocation/reservation system.
Inside the block bitmap, a few extra blocks were preallocated, storing both files in separate locations.

Instead of EXT2, where errors were corrected directly in the hard drive, EXT3 reserves space for each specific inode in memory. In the event of a crash, all data would be stored in memory, and thus, not corrupting the HDD itself.
Online Resizer
EXT3 also implements a protocol to support LVM, which allows for many disks to be used as a single partition. The largest possible space EXT3 supports without patches is 16 GB.
Partition Layout

EXT4
Larger FS
EXT3 can only support up to 16 TB. This is why EXT4 was created.
Instead of 32 bits capacity to count blocks, EXT4 divides each entry in the block descriptor table in two parts: An upper, and a lower entry. This lower entry extends the upper one, and since each supports up to 32 bits, the total supported block count (in the block descriptor table) rises to 64 bits (16 TB → 1,000,000,000 TB).
Extents
Instead of using block mapping (the filesystem allocates blocks individually for each file), which can lead to fragmentation, EXT4 uses extents, a range of contiguous blocks, allocated to each file.
This uses a 48 bit system, which limits the FS capacity to 1 EB (1,000,000 TB).
Each extent can point to 128 MB of data, or 1 block group.
Compatibility
The EXT4 driver supports EXT3 as well, and so, the Linux kernel only uses the EXT2 and EXT4 drivers. The EXT3 driver was removed as the new one is more performant.
HTrees
HTrees are now enabled by default, allowing up to 10 million subdirectories. However, EXT4 implements a Three Level HTree, which can be enabled using the large_dir flag, and extends this limit to 2 Billion subdirectories.
Fast FS Check
The big_itable_unused field was added to the block descriptor table, allowing for fast filesystem checks and error correction, as well as some other improvements.
Multiblock Allocation
Previously, each block needed one call to be allocated. EXT4 added support for multi-block allocation, which means that only one call is needed to allocate multiple blocks.
Delayed Allocation
Every write command is delayed for as long as possible, making it so that changes can be made in memory before they affect (and possible fragment) the actual drive.
Persistent PreAllocaition
The FS can now be called to preallocate an empty extent, so, once that file is populated, it stays as a contiguous space.
Metadata Checksums
Metadata is checked often, which helps find any issues with the file system, as each data structure is now properly ‘documented’.
Better Times
- A creation time was added;
- The time precision was increased to nanoseconds instead of only seconds;
- The maximum supported time was increased as well (the standard UNIX time can only go up to 2038).
Extended Attributes
The filesystem can also be customized with new entries at the end of each inode.
Quotas
EXT4 also supports adding limits to the size of a file, or even multiple files spread across the filesystem.
Barriers
Some hard drives have caches, which impact the journal, sometimes causing it to be written after the cache, which would create conflicts. To fix this issue, EXT4 creates a ‘barrier’, preventing the disk from writing data before the journal is written to the drive. This feature impacts performance, but is also very needed.
Flexible Block Groups
Groups blocks together, isolating chucks to write data on, which helps make data more contiguous.
Meta Block Groups
If the whole filesystem was only a single block group, it would max out at 256 TB of total data. Using meta block groups, this limit is increased to 32 bits of block group descriptor, which makes the total capacity of the filesystem 512 PB.
exFAT
The exFAT filesystem, developed by Microsoft, was designed to be a lightweight file system to expand FAT-32, which couldn’t handle files over 4GB, and had a small maximum partition size.
While EXT2-4 were made to be used with HDDs, and later, SSDs, exFAT was designed specifically for flash memory, typically used in removable storage devices (USB drives, SD cards, etc).
Though exFAT is not suitable for Linux installations, and doesn’t have a journal, it is recognized by every major operating system, so it can be used to share information between them.
Use Cases
FAT-32: Use for small USB/SD devices, if no file exceeds 4GB. This is the most compatible format, so it can be used with very old systems and some embedded devices.exFAT: Use for external drives and large USB/SD devices, if compatibility with macOS and Window is needed.EXT2: Use for very simple filesystems, such as the/bootpartition, where journaling is not needed.EXT3: Deprecated. TheEXT3module is handled byEXT4on recent systems.EXT4: Use for system partitions, and for any SSD or large storage device under Linux.
File Permissions
Both EXT2 and EXT4 support basic file permissions such as these, but EXT4 adds some more advanced features.
Permission Groups
- Owner: Permissions for whoever owns the file.
- Group: Permissions for the group assigned to the file.
- Others: Permissions for everyone else.
Permissions
File permissions can be represented by characters or binary.
Read:
r--4Write:
-w-2Execute:
--x1Read, Write and Execute:
rwx7Read and Write:
rw-6Read and Execute:
r-x5
Manage Permissions
Read Permissions
ls -l
> drwxr-xr-x 2 trude trude 4096 Apr 5 18:56 Desktop

In this example, the binary representation would be 755.
Modify Permissions
# Change the owner
sudo chown owner filename

# Change the owner and group
sudo chown owner:group filename

# Change permissions
sudo chmod 774 filename
Common Permissions
644: File Baseline755: Directory Baseline400: Key Pair
/root Directory Structure
Root directories might vary slightly between distributions (and other UNIX systems), however, the ‘base’ is always the same. For example, a Debian root directory would be the following:
/
├── bin   -> /usr/bin
├── boot (Mount point for /boot partition)
│   ├── grub/grub2    (GRUB configuration and modules)
│   ├── efi           (EFI System Partition - UEFI systems)
│   └── kernels       (Kernel images - may be under grub)
├── dev
│   ├── pts           (Pseudo-terminals)
│   ├── shm           (Shared memory)
│   ├── null          (Null device)
│   ├── zero          (Zero device)
│   ├── random        (Random number generator)
│   └── urandom       (Non-blocking random number generator)
├── etc (Configuration files)
│   ├── network       (Networking configuration)
│   ├── systemd       (Systemd configuration)
│   ├── default       (Default settings for programs)
│   ├── init.d        (Legacy init scripts / systemd link)
│   ├── ssh           (SSH server and client configuration)
│   ├── X11           (X Window System configuration)
│   ├── pam.d         (PAM configuration)
│   └── security      (Security-related configuration)
├── home (Home Directories)
├── lib   -> /usr/lib
├── lib64 -> /usr/lib64
├── media    (Mount Point for Removable Media)
├── mnt      (Temporary Mount Point)
├── opt      (Optional Packages)
├── proc     (Process Information - Virtual Filesystem)
│   ├── self          (Symbolic link to the current process's directory)
│   ├── cpuinfo       (CPU information)
│   ├── meminfo       (Memory information)
│   ├── mounts        (Mounted file systems)
│   ├── cmdline       (Kernel command line)
│   ├── <PID>         (Directories for each process, named by PID)
├── root (Root User's Home Directory)
├── run
│   ├── systemd       (Systemd runtime data)
│   ├── user          (User-specific runtime data)
│   └── lock          (Lock files)
├── sbin  -> /usr/sbin
├── srv (Service Data)
├── sys (System Information - Virtual Filesystem)
│   ├── devices       (Device tree)
│   ├── firmware      (Firmware information)
│   ├── power         (Power management settings)
│   ├── kernel        (Kernel parameters)
│   └── module        (Kernel modules)
├── tmp (Temporary Files)
├── usr (User Programs and Data)
│   ├── bin           (User binaries)
│   ├── sbin          (Non-essential system administration commands)
│   ├── lib           (Libraries for /usr/bin and /usr/sbin)
│   ├── include       (Header files for C/C++ development)
│   ├── share         (Architecture-independent data)
│   └── local         (Locally installed software)
└── var (Variable Data)
    ├── log           (System log files)
    ├── tmp           (Temporary files that persist across reboots)
    ├── lib           (Variable data for installed programs)
    ├── cache         (Cached data for applications)
    └── spool         (Spool directories)
Run
man hierfor more details.
Package Manager (apt)
Without a package manager, the only way to install new programs would be to manually compile them from source. Although it is possible to install software this way, having a central software repository facilitates installing new software, managing updates, and configuring each package for the distribution it is running on.
Debian uses apt as its package manager.
Repositories
Most distributions have a repository of their own: Some distributions only provide source code, but the vast majority serve pre-compiled packages instead. For example, on Debian, it’s common to use deb.debian.org as a remote to fetch packages from, but many more are available.
Debian has three releases in active maintenance:
stable: The recommended production release.testing: Contains newer, less tested versions of software.unstable: Used mainly by developers; Has the latest packages.
To add a new package (or version of the package) to Debian, it is first reviewed by maintainers, then, if accepted, it is added to unstable. After waiting a period of time to make sure the program meets the testing criteria (few bugs, dependencies are met, etc), the program is moved to testing. Eventually, after further testing and error correction, the entire testing branch becomes Debian’s next stable release.
A package is a collection of software, containing executables, libraries, configuration, documentation, and metadata. This metadata includes the package name, version, dependencies and maintainer, to name a few. To read a package’s metadata, run: apt info package_name.
Configure Repositories
Repositories are configured in the /etc/apt/sources.list file. For example:
deb http://deb.debian.org/debian/ testing main non-free contrib
deb-src http://deb.debian.org/debian/ testing main non-free contrib
deb http://security.debian.org/debian-security testing-security main
Alternatively, repositories can also be placed under /etc/apt/sources.list.d/, as individual .list files. apt merges both locations when searching for packages.
There are two ways to configure repositories: Using their codename, or release type.
For example, at the time of writing, the testing branch is code-named trixie.
deb http://deb.debian.org/debian/ trixie main non-free contrib
deb-src http://deb.debian.org/debian/ trixie main non-free contrib
deb http://security.debian.org/debian-security trixie-security main
Initially, this configuration would serve the exact same purpose as the previous one, however, after the testing branch is ready, it becomes the next stable release, and apt would continue to use trixie, which would be the new stable release. Using codenames this way prevents apt from upgrading to the next Debian version automatically. Using stable would always point to the next stable release, which would now be bookworm, but in the near future, would automatically switch to trixie. The exception to this rule is unstable (sid), as it is a rolling release, and has no versions. Once a package is tested on it, it is merged with the testing branch, individually.
WARNING: While upgrading to a newer version is supported, downgrading is not. Moving from
trixietobookworm, for example, would breakapt. The correct way to downgrade is to use the codename for the testing release, and wait for it to become stable.
Update Packages
When apt update is executed, apt first downloads the index for every repository available, and then builds a local package database. Then, to actually upgrade the installed packages, use apt upgrade.
The following commands would update every package on the system and perform apt maintenance tasks:
sudo apt update
sudo apt upgrade
sudo apt full-upgrade # Allows handling of dependencies by removing or installing new packages. Same as dist-upgrade.
sudo apt autoremove # Remove unused dependencies.
sudo apt autoclean # Remove old local repository entries.
Manage Packages
apt search search_term # Search in package descriptions
sudo apt install package_name # Install a package
sudo apt remove package_name # Remove the binary package
sudo apt purge package_name # Remove the binary package and configuration files
Flatpak
While central repositories are very useful, they are specific to each distribution. Because of this, if a developer wishes to publish an app for Linux, they would have to ship their program in many packaging formats, and test it on every distro they plan to support.
Flatpak is a universal packaging format for Linux. A flatpak acts as a container, and ships not only the program, but also its own filesystem and dependencies. If a flatpak works on one machine, in theory, it would work on any computer, using any distribution, since the environment is the same. Flatpaks are also isolated from the main system, and are managed with permissions, similarly to mobile applications.
Flatpak’s approach brings many issues, however. Programs are not as integrated with the host system, they use much more disk space, and are often slower.
As a general rule, use flatpaks if the Debian counterpart either doesn’t exist, if it is much older (and you need the latest version), or for proprietary apps such as Discord and Steam, as their flatpak version isolates those programs and prevents them from abusing native permissions.
Install Flatpak
sudo apt install flatpak

# Install the GNOME Software Plugin if using GNOME
sudo apt install gnome-software-plugin-flatpak

# Install the Plasma Discover Plugin if using KDE Plasma
sudo apt install plasma-discover-backend-flatpak
Repositories
To fetch updates and install new software, flatpaks also require their own repository. Flatpak apps are available as soon as the developer publishes them, either on their own repository, or on a central one, such as Flathub, which acts a lot like an “app store”, compared to Debian’s staged approach.
To add FlatHub, run the command below:
sudo flatpak remote-add --if-not-exists flathub https://flathub.org/repo/flathub.flatpakrepo
Then, to install programs:
flatpak install flathub app_name
Once a flatpak app is installed, it can’t be executed from bash directly, as it is not part of the underlying system. These programs must be launched either through the .desktop file flatpak creates when installing a new app, or using the flatpak command, itself:
flatpak run app_name
Manual Pages
Debian packages often come with manual pages (especially command-line utilities). These files are typically written in the troff format, with the -man macros, and are moved to /usr/share/man after installation.
The man utility can search for manual pages and display their content using a pager such as less. It can also handle BSD manual pages in the mdoc format.
To read the manual page for a given utility, run:
man utility
While reading the page, press h to display help within less.
Sections
Man pages are organized into sections:
- Executable programs or shell commands
- System calls
- Library calls
- Special files (devices)
- File formats and conventions
- Games
- Miscellaneous (macro packages, etc…)
- System administration commands (usually for root)
- Kernel routines (non-standard)
man section utility # Read the manual page for utility in section.
Search
Both the following commands search for man pages containing search_term in their short description.
apropos search_term # Search for a manual page
apropos --and s1 s2 # Search using multiple search terms
Use apropos . to list all known pages.
TL;DR
Sometimes, one might not have the time to read a manual page, or need a quick reference to use some command.
Debian doesn’t come with tldr by default, but after installing it, run tldr command to see examples of using that command, or tldr command subcommand for a cheat sheet on that subcommand.
Networking
iproute2
The iproute2 package provides a collection of networking and traffic control utilities. Once again, Debian doesn’t ship all of these, only those deemed necessary.
arpd | bridge | ctstat | dcb | devlink |
genl | ifstat | ip | lnstat | nstat |
rdma | routel | rtacct | rtmon | rtstat |
ss | tc | tipc | vdpa |
The Debian installer automatically configures Ethernet and/or Wi-Fi if an interface is available. To change such configurations, edit /etc/network/interfaces.
Both DNS and DHCP are managed by systemd-resolved and dhclient, respectively.
Network Manager
To facilitate configuring networks, it’s very common to install Network Manager on top of Debian’s default utilities.
sudo apt install network-manager

# Move the current configuration (so NM can take over)
sudo mv /etc/network/interfaces /etc/network/interfaces.bckp
sudo systemctl restart networking
sudo service NetworkManager restart
After Network Manager is enabled, the nmtui command can be used to easily connect to new networks and change configurations.
Logging
Since Debian uses systemd, its logging mechanism, systemd-journald is the primary logging service. journald collects logs from the kernel, system services and applications, and then stores them in a binary format, which allows for efficient queries.
To read system logs, use journalctl.
Desktop (Graphical Stack)
Although the CLI can do almost anything a graphical session can, especially on servers, Linux systems can also be used as desktop computers.
Wayland and Compositors
Wayland is a display server protocol: It defines how a compositor and clients (applications) communicate.
To draw the program window, the client first renders its content into off-screen buffers, and then uses the libwayland-client to inform the compositor of which parts were updated. The Wayland compositor then uses libwayland-server to collect these buffers, composite them into the final scene to display (using OpenGL), and accesses kernel interfaces (DRM/KMS) to update the physical display. The compositor also receives input events through libinput (which uses the kernel’s evdev), and forwards them to the currently focused application.
For example, GNOME uses Mutter as its window manager. To draw the desktop on the screen, the GNOME Shell (a client which provides the top bar, overview, dash, and other user interface elements) communicates with Mutter to draw its elements on the screen. Clients also make use of Mesa to render their content, which is then handled by the window manager.
Desktop Environments
A desktop environment is a collection of the tools listed above. It includes a window manager, a set of applications, and a graphical desktop with menus, settings, panels and an application menu, among other elements.
The default applications provided by the desktop can use one of two toolkits: GTK and QT. These act as abstractions on top of the graphical stack, and provide pre-made menus, buttons, text boxes, along many other elements, according to their own design specifications. Because of this, a GTK app would better on GNOME opposed to KDE, and QT apps feel more at home on KDE Plasma instead of GNOME.
If you haven’t yet decided which desktop environment to use, I recommend that you read my blog post introducing new users to Linux, on the Desktop Environment section.
Install a Desktop Environment
Debian’s installer offers the possibility to install a desktop environment, which comes with a collection of programs and tooling selected by the Debian team. Although these are good options, the default selection is meant to be ready “out of the box”, for any use-case. These metapackages include an office suite, games, language support, and many other programs, some of which you might not need. To set up a more minimal installation, skip installing a desktop environment and only select the standard system utilities:

Then, after the installation finishes, install your preferred desktop environment. For GNOME, as an example, run:
sudo apt update
sudo apt install gnome-core # or kde-plasma-desktop
sudo systemctl reboot
GNOME uses Network Manager as a dependency, and provides a graphical interface to manage networks. Although it will be automatically installed by apt, make sure to enable it following the steps in the Network Manager section.